Why You Should Use Clothing In Quilt Patterns
- Ashley Ponder
- Aug 2, 2024
- 6 min read
Updated: Feb 15, 2025
Several years ago, I decided to do something a little crazy! I used my customer's clothing in place of quilting cotton in a regular quilt pattern. The result?? Something so personal and memorable! Today I wanted to share a new idea: if you have t-shirts or clothing, you aren't limited to just a "t-shirt quilt!" Meaning the standard puzzle piece design. Don't get me wrong...I do love a puzzle-pieced quilt!

When you consider the ability to use your shirts in ANY quilt pattern, your options are endless and the designs you make can not only be incredibly memorable but insanely awesome.
Would you believe one stack of shirts from a customer created 20 Christmas stockings and four baby quilts??
I'm not sure why this idea seems revolutionary to me. Why do we have to just cut the shirts out and sew them together in rows?? I'm here to help you break the mold! Let me share some things that I have learned.
How to Choose the Right Shirts:
It's helpful if you have more than enough shirts to choose from when creating! Some shirts you won't be able to use. A little disclaimer here...I regularly say 't-shirts' but I'm usually referring to any type of clothing that someone may want to save and use in a memory quilt. Examples are button-downs, shirts, linen pants, etc. Any type of clothing can be used, but some materials should be avoided. Here are some things to consider when choosing shirts for your quilt:
Is it heavyweight? If the shirt is thick or really stiff, we don't want to use it. Since we pair our shirts with quilting cotton as the background fabric, the differences in fabric weights can make the quilt look odd. You'll have fat points in your quilt right next to thin points. Plus, it can be difficult to quilt through heavier fabrics on a domestic machine. Examples: Denim, corduroy, canvas, wool.
Can you iron it? Certain types of clothing, such as silk and some polyester materials, melt when ironed. This isn't ideal when we want to create a quilt block and press our seams! I set these shirts aside. When in doubt, test a small section of your shirt with a low heat setting. Examples: Spandex, silk, acrylic, nylon, polyester.
Is it super stretchy? Nope. Don't even try. I always set these to the side. While you can stabilize shirts that are stretchier, I feel like the stabilizer takes away from the quilts and don't use it. I realize that this could be considered a sin among quilters...I'll explain more about this below!
What type of pattern/color does it have on it? This question is a more long-term thought. Look at the pattern on your shirt (if it has one). Is it way too busy or have colors that are difficult to match? You can probably go ahead and set this one aside unless you think it would work for a specific purpose. But don't completely discredit it! It may work for a future project. Example: the busy Christmas-colored fabrics below never worked for the baby quilts but they were perfect when my customer wanted to do Christmas stockings!

How to Get Started
Getting started can often seem like the scariest part! Especially if you're working with someone else's (or your own) precious shirts. Here are a few tips that can help things go more smoothly.
First things first...study your pattern. This is really important. Figure out what size blocks you need and what types of blocks you will be assembling. Doing this first helps you to decide which shirts to use and to have less waste. One of the main goals that I have during t-shirt quilts is to have as much of the shirt preserved after cutting as possible. You can use them so many more times if you're careful! Here are some things to consider:
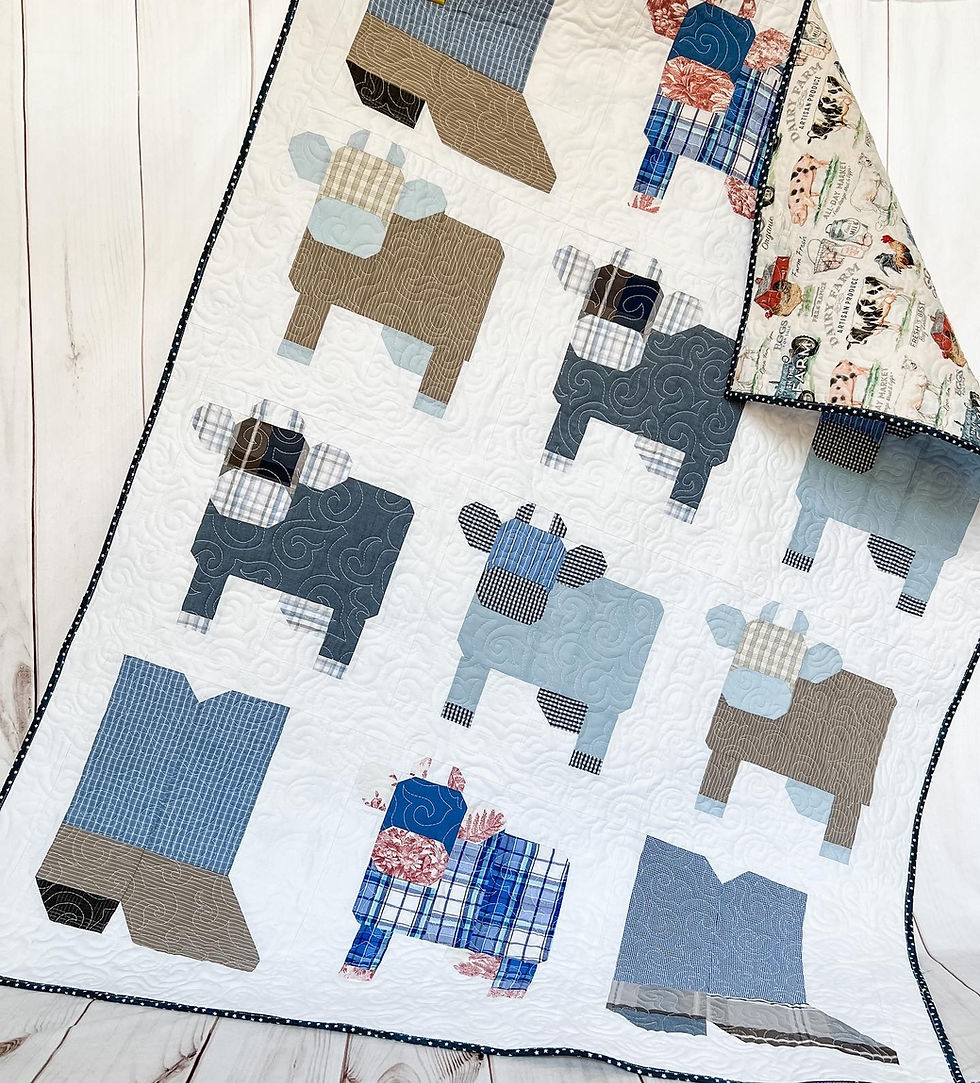
Will you need to match patterns? For example, if it's an animal quilt block- do the legs need to seamlessly meet the body? If you are working with directional fabric- consider which way you're sewing the blocks to make sure that the pattern is right-side-up in the final result.
Are there a lot of seams in your block? If so, avoid fabrics that may be too thick. You will have to quilt over these later!
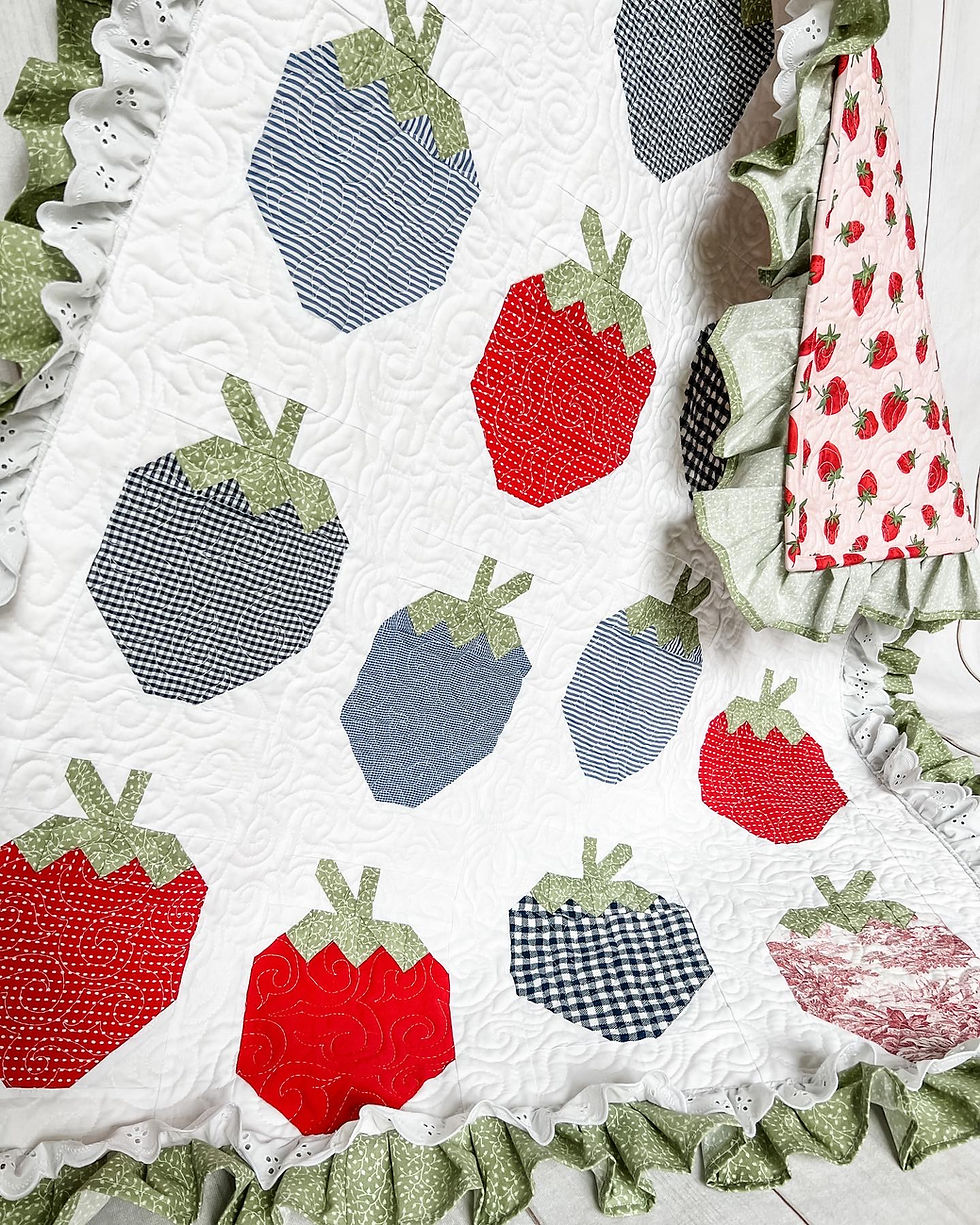
What kind of background fabric would work best? For some patterns with busier/bright shirt patterns, I find that it's best to incorporate the same quilting cotton throughout the quilt to make things more cohesive. In the strawberry quilt below, notice how I used the same green fabric for the tops of the fruit and around the border. It helps to bring everything together.

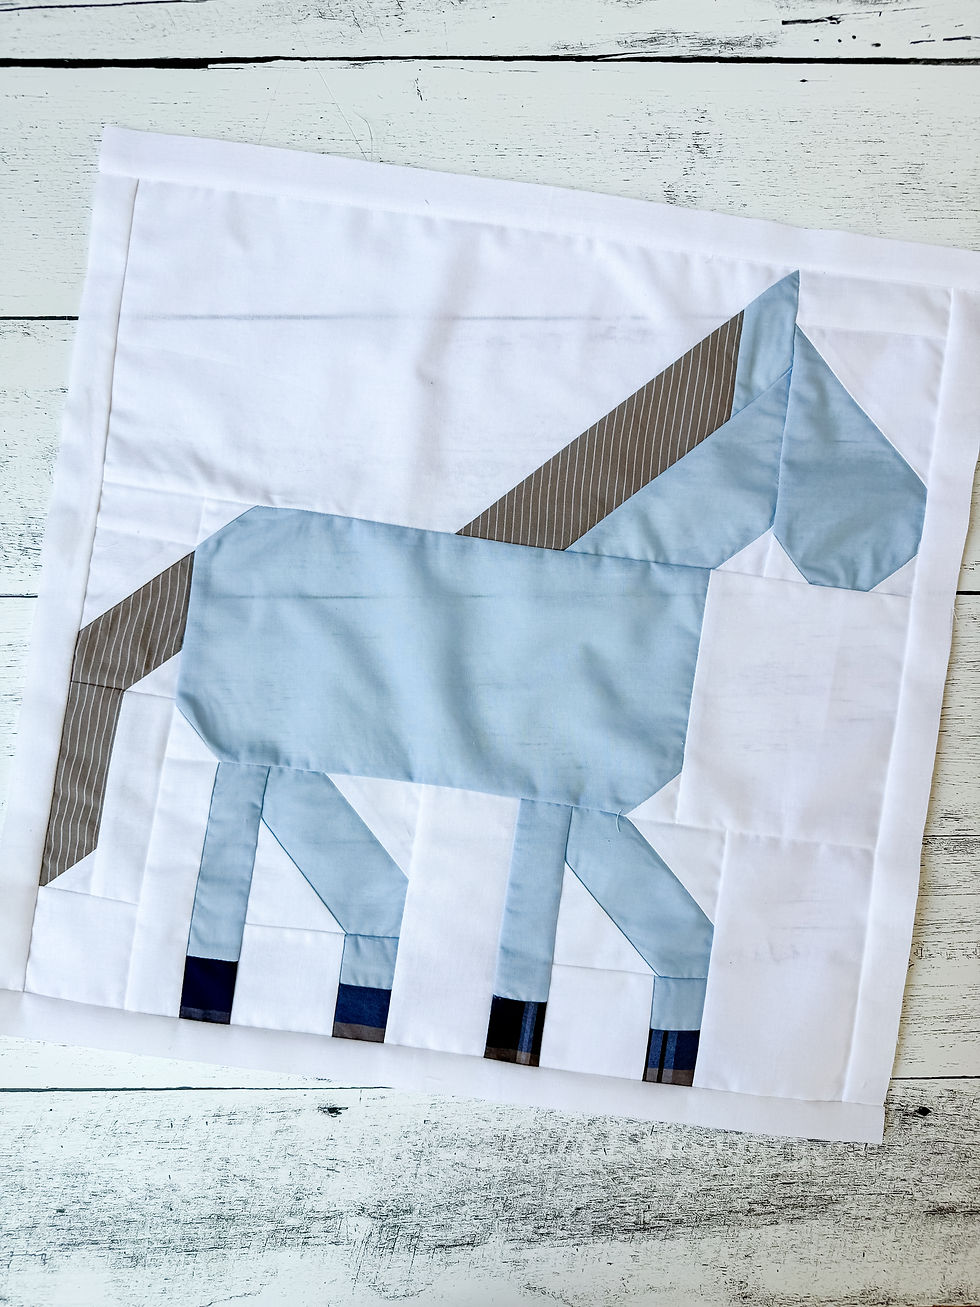
Quick Cutting Tip: Plaids and stripes can be a little tricky to use, particularly if your blocks have multiple parts to sew. Try to use a smaller ruler or even one the same size as the blocks that you need. It's easier to use the straight edge of a ruler and line it up with the lines on your plaid or striped shirt to make sure you cut your block straight. If you cut your shirt crooked, you will be able to tell in the final layout of your quilt. In the example below, notice how I matched the stripes on the two pieces of the tail and the direction of the stripes on the mane. Little details like this take more time, but are worth it!

Cutting Tip Part Two: ALWAYS double-check that your block measurements are the same (or dangerously close) as what the pattern calls for. I realize that it takes more time and sometimes we just assume our seam allowances are correct. However, it's easy for clothing to stretch out of shape. Take the time to measure each individual part of your block assembly and final block to make sure that it's the correct shape. You'll thank me later!
Let's talk about stabilizers.
Hold on to your seat because I may scare you here...I do not use stabilizers when creating t-shirt quilts. Yes, you read that right. I'm sure fellow quilters are either rolling their eyes or clicking the back/exit button as we speak!
Even when doing puzzle-pieced layout quilts, I just don't use it. This is a personal preference. I feel as though the stabilizer takes away from the overall feel of the shirts and makes the whole quilt not as cuddly. One of the most special things that I can give to a customer is a blanket that hugs them, filled with memories of the person they love most. Stabilizer takes away from that.
So how do I do this??
I surround the shirts with quilting cotton when possible. Each block has a border of cotton or cotton is used as the background fabric. Since the quilting cotton is stable, I pair it with the clothing to help it hold its shape. I also use the clothing gently. I'm not pressing it like a panini! Very carefully cut, sew, and press to keep it from distorting or losing its shape.
Think Outside the Box to Elevate Your Quilt:
Consider using a shirt with buttons, pockets, or a collar. This can add something special to your quilt! Clip buttons from a shirt to sew into your quilt or leave shirt pockets in place while cutting. If you're working with patches and aren't able to use the whole shirt, you can remove these and hand-stitch or machine-stitch them onto your finished quilt!
Find a quilt backing that is meaningful to the customer. For example, the quilt below is made with a customer's late husband's clothing. They loved spending their time together at the beach, which is where they planned to retire before he passed. She asked me to find a beach fabric for the back of the quilt. Don't limit yourself to quilts with t-shirts. Think pillows, stockings, placemats, etc.

Selecting patterns:
While you really can use all of these suggestions for any quilt pattern, when I'm choosing a pattern for my clothing quilt, I tend to look for something more simple. The only reason I say this is because the more complex the quilt you have, the more complex the cutting is. Quilts are designed to be cut from straight fabric by the yard. You can easily cut out 124 little squares. However, when you want to translate this into a shirt that has plaids or stripes, it takes significantly longer! I also opt for smaller sized quilts, depending on the amount of clothes I have to work with. If I only have a handful of clothing to use, I'm not looking for a king sized pattern!
Last Tip:
You got this. Treat this quilt like any other! Quilt it like usual. The only difference I have found is taking care of the seams to make sure they are laying flat and my machine doesn't get hung up. I have quilted these types of quilts on my long arm as well as my sit-down machine. Both are equally beautiful and loved by each customer!
Reach out to me if you have questions or if I can help! Tag me in what you make on Instagram.
Until next time...
-Ashley


Comments